I have a poorly child at home today, asleep on the couch, so it's an at-home day for us. I had a long list of chores, number 1 on my list was to clean the bathroom. But somehow I got completely sidetracked by Action Pack: Family Apothecary e-magazine, created by Kathreen Ricketson, of whipup.net. Tragically, Kathreen passed away last year and my thoughts were on her and her children as I spent the morning making things from this beautiful magazine.
I made a shampoo, from castile soap, bicarb of soda, water and avocado oil. I'm not sure how this is going to go, since I've had limited success with natural hair products in the past, but I'll give it a whirl. Next was some lavender and peppermint lip balm, made from beeswax, olive oil, plus lavender and peppermint oils. I've made this before, and it worked really well. I was really scratching around for small containers to put it in so I ended up using a contact lens container. Waste not want not! I also made a deodorant, using cornflour, bicarbonate of soda, shea butter, tea tree, eucalyptus and lemon oils. The last time I made this I used coconut oil. Coconut oil has come a long way, but I still can't seem to shake that sunbaking-on-the-beach feeling every time I use it. So I'm pleased I had some shea butter this time. Despite the smell, the coconut oil version was very effective.
I also made some bath salts, using bicarb (again), epsom salts and lavender oil. And then... natural toothpaste! It contains coconut oil, bicarb, peppermint oil, clove oil and bentonite clay. A small amount of castile soap was listed as an optional ingredient, but I just couldn't get my head around having soap in toothpaste. Funny, because I have no idea what goes into commercial toothpaste. If I did, I probably would have stopped using it long ago. Anyway - the toothpaste is great! Tasty, and my teeth certainly felt clean afterwards. At that point I ran out of steam. There are heaps of other recipes in the magazine to try, including compresses, healing salves, body scrubs and natural cleaners. It really is an amazing resource.
Showing posts with label handmade. Show all posts
25 January, 2014
Apothecary Concoctions
Labels:
bath salts,
coconut oil,
cosmetics,
handmade,
moisturiser,
shampoo,
soap,
toothpaste
21 January, 2014
Re-arranging
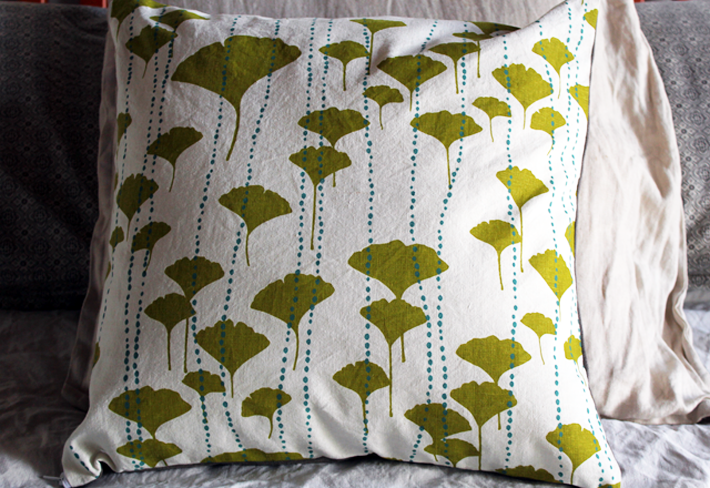
I have been obsessively making cushions these past few days. So easy and satisfying. Totally in love with this Ink and Spindle fabric my hubby bought me for Xmas, from Bolt of Cloth. I could spend all day and all my money in that place. I let out a very undignified squeal when I started to unwrap the package, and noticed that it was wrapped with this tiny sliver of Frida Kahlo fabric, from Alexander Henry that I saw in the shop last time I was there. I hit the jackpot with that package... this Ink and Spindle fabric, some beautiful Kokka fabric and a Marimekko teapot. So spoilt.
This naturally led to some re-arranging of furniture and digging out of some old prints.
Printmaking class starts in a couple of weeks. Can't wait!
This naturally led to some re-arranging of furniture and digging out of some old prints.
Printmaking class starts in a couple of weeks. Can't wait!
Labels:
cushions,
fabric,
handmade,
Ink and Spindle,
Marimekko,
printmaking,
upholstery
15 January, 2014
Happy New Year!
I thought I'd get back into the swing of this blog by posting my first 'make' of the new year. I was at a friend's house over the holidays and came away feeling totally inspired after seeing all the cool stuff she has been creating. It's a paper lantern, designed by graphic designer Gabrielle Guy and featured on Design Sponge. It was a fun and easy make. A paper lantern, some scrap paper, glue and hours of cutting and pasting... and voila.
This was a great project to start the new year with. Despite consistently making and creating all last year, I never really found my blogging mojo. I really got into clothes making, but was never really happy with the final photos, so they remained to be seen in real life only! Even so, I'm pretty happy with what I achieved. I just did a quick count and came up with 25 items of clothing, 10 or so bags plus various other bits and pieces like dolls as presents. This year I'm hoping to get back into other arty interests like printmaking and ceramics plus continue with the sewing. I will have to get a bit more confident of posting pics of myself online!
05 August, 2013
Taking Stock
Playing Along with Pip, here.
Making: someone happy
Cooking: raspberry ripple. Yum!
Drinking: tea, tea and more tea
Reading: The Dressmaker, Rosalie Ham
Wanting: My Colette Anise pattern to arrive in the mail
Looking: for inspiration
Playing: Willbee the Bumblebee
Wasting: away. Not!
Sewing: the Valerie top
Wishing: for Green and Black 85%
Enjoying: The Good Wife
Waiting: for a winter break
Liking: kinas
Wondering: whether Alicia and Will will get together at the end of season 4
Loving: that extra half hour of daylight
Hoping: that they will!
Marvelling: screen prints
Needing: miles under my belt
Smelling: winter sea breezes
Wearing: ugg boots. They're an investment!
Following: friends
Noticing: stone cold tea
Knowing: that if you do fun things every day, the universe re-configures around you
Thinking: about red highlights
Feeling: like bed
Bookmarking: healthy treats
Opening: packages
Giggling: with little people
Feeling: finished.
18 July, 2013
Letterpress workshop
A few months ago I attended a one day class to learn the basics of letterpress printing at GTO Printers in Auckland. It was a small class, only three of us in total, which worked out perfectly. It was so much fun, the day just flew by. We started by working with a little Adana press (hope I've got that right), setting metal type into an alphabet. Getting all the letters set correctly, left to right (or was it right to left???) and the right way up really messed with my head. There were a few back to front, upside down mishaps to start with. And if you get it wrong, you have to pull the whole row out and start again. Then we designed a postcard to print, also in metal type.
By the end of the day we progressed to using the wood type. We were running short of time, so did a collaborative print on the proofing press. I loved using the wood type. The objects themselves, with all of the different shapes and colours left from previous print jobs make just as nice an image as the final print, don't you think?
16 July, 2013
Linen Teddy
Last month I was lucky enough to get a whole weekend to myself to attend Handmade in Wellington. There was so much inspiration, from fun classes on handmade cosmetics and jewellery making, to wandering around the shops and cafes in Wellington, and actually being able to browse for as long as I wanted! One of the highlights was meeting the lovely Melissa Wastney from Tiny Happy. When I got home, I ordered a copy of her book Sweet & Simple Handmade. It's a really beautiful book, with so many lovely projects to make for kids. This is the first one I've made - the linen teddy. It was a really easy project to start with and I enjoyed making it, with a bit of input on fabric choices from the kids. I added the dress (which isn't in the pattern), just because I could :) It's for a little friend of ours who just turned one.
21 February, 2013
Intaglio etching
We've all been laid up with bugs in my house this week, so there hasn't been much new creative stuff going on. Nothing serious, just nasty colds. I'm dying to have that clear headed feeling again that comes with recovering from a bout of illness, where you're full of ideas and have the energy to get into them.
Anyway, I thought I'd post something I made a while ago, in a printmaking class I took. The first is an etching, made with the skeleton of a day lily from my garden. We used a zinc plate, painted with a waxy substance (called asphaltum) with the lily sitting on top, which is then run through a high pressure printing press. The lily is peeled off, leaving an image on the plate, which is then dipped into a bath of acid and the image is etched into the plate. Ink is applied to the plate and run through the press again with some paper.
It's such an incredibly fiddly process to get right. If you run the plate through the press at the wrong pressure you can buckle the plate, if you leave the acid in the bath for too long you can bite too hard into the plate and lose the detail in the image, you can put your inky fingers all over the plate, soak the paper too little or for too long.... the list is endless, and I did all of these things and more. It was so incredibly frustrating! However there's a moment after you run the plate through the press, when you're holding your breath as you peel the paper up to have a look. And when you get it right, it's just magic. The results are worth all the effort. It's quite an addictive process. Each time I printed, I thought, maybe if I just ink it up and run it though again I can get something better.
The second print was a bit more straightforward. It is a drypoint etching, which is a drawing scratched with a needle into plastic, inked up and run through the printing press. The image on the bottom left is a printed photo of some refrigerated shipping containers.
I'm quite addicted to printmaking. Unfortunately it's not the kind of thing you can do on your own at home without considerable setup and lots of dangerous ingredients. But also, there's so much to learn, I think it's best done in the company of someone very experienced. Maybe I will go and look at the class timetable for next term...
Anyway, I thought I'd post something I made a while ago, in a printmaking class I took. The first is an etching, made with the skeleton of a day lily from my garden. We used a zinc plate, painted with a waxy substance (called asphaltum) with the lily sitting on top, which is then run through a high pressure printing press. The lily is peeled off, leaving an image on the plate, which is then dipped into a bath of acid and the image is etched into the plate. Ink is applied to the plate and run through the press again with some paper.
It's such an incredibly fiddly process to get right. If you run the plate through the press at the wrong pressure you can buckle the plate, if you leave the acid in the bath for too long you can bite too hard into the plate and lose the detail in the image, you can put your inky fingers all over the plate, soak the paper too little or for too long.... the list is endless, and I did all of these things and more. It was so incredibly frustrating! However there's a moment after you run the plate through the press, when you're holding your breath as you peel the paper up to have a look. And when you get it right, it's just magic. The results are worth all the effort. It's quite an addictive process. Each time I printed, I thought, maybe if I just ink it up and run it though again I can get something better.
The second print was a bit more straightforward. It is a drypoint etching, which is a drawing scratched with a needle into plastic, inked up and run through the printing press. The image on the bottom left is a printed photo of some refrigerated shipping containers.
I'm quite addicted to printmaking. Unfortunately it's not the kind of thing you can do on your own at home without considerable setup and lots of dangerous ingredients. But also, there's so much to learn, I think it's best done in the company of someone very experienced. Maybe I will go and look at the class timetable for next term...
14 February, 2013
My Creative Space
Another chair done (the one on the right), eight to go. I spent hours pulling out staples from the old upholstery and it took about five minutes to re-cover it. Now just have to find some more fabric for the rest!
Check out these awesome crafty folk over at My Creative Space.
Subscribe to:
Posts (Atom)